Evolution of the Tutu

The earliest tutu can be dated back to 1832 in the La Sylphide ballet in Paris. The ballet starred Marie Taglioni in a dress made of a white bodice and bell-shaped skirt that was cut just above the ankles. The costume quickly became the standard dress for ballerinas and sparked what is now known as the romantic era of ballet. The creation of the tutu was only made possible due to the advances of technology in the Industrial Revolution, cotton muslin and gauze (materials used to make tutus) were no longer only available in India and could be produced worldwide. Also, bobbinet (or tulle, as it is known today), a fabric previously made by hand could now be mass produced on weaving machines, this is notable because lots of tulle is needed to make the layers of the skirt, creating the illusion that the dancer is floating.

Towards the end of the 19th century, the style of dance used in ballet had developed and the style of the tutu had to evolve alongside it. Footwork and elegant leg movements had now become a big part of ballet and the low-cut dresses in the early part of the century would have been too restrictive, so the tutu was cut shorter to above the knee, allowing the legs to be seen and freeing the feet of any obstructions. This style of tutu also featured an elaborately decorated bodice and became known as the classical era of ballet as it is the silhouette most people imagine when they think of a ballerina.

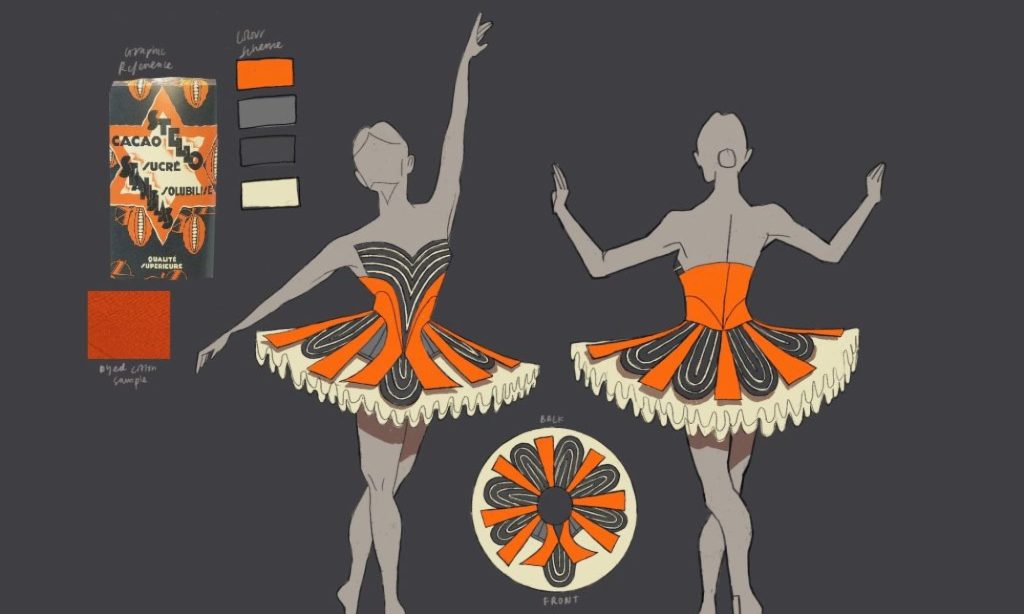
Regardless of the role they played, the tutu had become the uniform of all ballerinas by the 20th century. The Ballets Russes however, a company founded by Sergei Diaghilev, was created to challenge and rebel against these ideas of how a ballerina should look. Instead of a single uniform, the Ballets Russes featured costumes that were designed specifically to the theme of each ballet.

Around the mid-20th century, we see tutus emerging that are more similar to the modern, “pancake”, tutu of today. To achieve this pancake style of silhouette, metal hoops came into use to help provide some structure to the skirt.

The tutu changed shape again in the late 1940s when Georgian-American choreographer
George Balanchine imagined a tutu that would allow audiences to see the dancer’s
movements without the inhibitions of a large skirt. Balanchine enlisted the help of costume
maker Barbara Karinska to bring his vision to life, creating the “powder puff” tutu that only
used 6-7 layers of tulle instead of the usual 10-12 layers, resulting in a smaller, shorter, and
lighter tutu. This wasn’t Karinska’s first innovation with the tutu though, some decade prior
she introduced the practice of cutting the side panels of the bodice on the bias. This allowed the bodice to sit tighter than it had before whilst also increasing the movement that the performers could have.

Sources:

https://pointemagazine.com/tutus/

Regency and Victorian Dance

In coalition with the industrial revolution, early 19th century saw an astounding increase in the production of printed materials, including music.  A country dancing tune of this era might be published in dozens of written sources, each paired with a different image of dancing figures. With this, the traditional ideas of a link between tune and dance figures had been severed. In the early 19th century people were encouraged to create new figure sequences to pair with music, this process of pairing movements with sound was known as “calling” a dance. In ceremonies, couples would take turns to “lead off” a country dance and the master of the ceremony would give instructions between the dancing couple and the band, almost how a conductor manages an orchestra.

During this time, Europe was at war with each other, but dances were still borrowed between countries. Lower and middle classes were beginning to have a bugger influence on popular dance, with modified country dances replacing earlier, formal styles of dance. Balls now opened with a polonaise or a Grand March that also provided a fashion display. Stage dance as well began to take shape, being separate from the ballroom dances and is the beginnings of Classical Ballet as we know it today.

Baroque Dance

Baroque dance is the standard name given to the style of dance with origins in the 17th century and remained well into the 18th century until the French Revolution. King Louis XIV had a major influence in its development, being an accomplished dancer by age 14. His courtiers were expected to dance in this new style at formal balls and were also performed in court ballets, similar to the Stuart court masques that took place during the same era. It ought to be noted that 17th century dance wasn’t merely of great social importance but carried political importance as well, hence why dances took p[lace in court rooms, something that would be highly unusual to witness today.

Renaissance Dance

Dance in the Renaissance period were interwoven across Europe, such were many fashions/trades of the time. Each region of Europe influenced each other at different times and we have to turn to written records for any great detail. Unfortunately, these records would have been written by the wealthy and educated so once again, we have limited knowledge of how the common people of this era enjoyed dance.

Burgundy and France – In Burgundy, dance had an important place in court life. This particular dance is known as the “basse dance” and is the best documented dance from the 15th century: it is performed by nobles and is a measured and steady dance with the intent that such movements display their magnificence. Usually this dance would be performed as couples but there are more ambitious routines were varying numbers of dancers part, come together, circle each other, and continue executing these movements to draw patterns with their bodies. Typically films set in this era will show the more complex form of the basse dance when noble people are seen partying.

Italian Dance – In the second half of the 15th century, a new style of dance was invented that combined the bassadanza with elements of popular dance. Today, such a dance is commonly known as the “Italian ballo”. It wasn’t unusual for these dances to accommodate up to 10 dancers and spread throughout the courts of Italy, with variations occurring depending on the regions the dance was performed in.

Dance in England – English traditions of 15th century dance can be found in the Gresley manuscript that documents 92 dance titles but only 26 choreographies, music, and surprisingly, no step descriptions. There is far less detail written about English dances during the Renaissance than any other European country and it is believed that the reason is because the dances were so well known that there was no reason to write them down.

Medieval Dance

We know little of dance in the Medieval period other than what can be understood from surviving illustrations and written music/literature. Paintings show dancers moving in either lines or circles, known as a carole/farandole dance. Such dances would have followed a verse and chorus sequence. Estampie, believed to be one of the earliest known solo couples dance can be seen in some of the illustrations from this era along with branle, a dance that can be found in late 16th century sources. Music through the Middle Ages is known to have lively rhythms with poetry speaking of how singers sung in the same breath.

Costumes worn in Medieval dance varies according to class. Upper class men and women would have worn dramatic and vibrant gowns made with luxurious materials such as silk, some of these costumes would have been sleeveless while others would have long, billowing sleeves for a dramatic effect when moving their arms in dance. Women would have also worn corsets under their dance attire in addition to headdresses that were worn for social occasions. Unfortunately little known is known of the dancewear for more common folk as it is mainly the wealthy that are depicted in portraits/paintings.

Additional Week

This additional week has been spent bringing the tutu to a display worthy state, sewing smaller pieces I didn’t have time to before, and fixing the bodice decoration.

The big issue with the bodice decoration was that the layers below shrunk as the piping was sewn between the seams. To account for this, I added 5cm seam allowance to the outer edge of the pieces as I remade the decoration.

Surprisingly, the bodice decoration didn’t shrink as much as it had previously but it still didn’t fully tack down flat. The backing fabric has bubbled a little bit but that shouldn’t be noticeable when it is sewn to the bodice.

With the bodice decoration looking better than it had before, I just needed to hem the edges and secure it to the bodice. I haven’t perfectly centred the bottom of the decoration and it annoys me that it looks a little wonky but I don’t think there’s an easy way to fix it.

After fixing the bodice, the next two days were spent properly stitching the decorations to the top plate so it would all lie flat. I had expected them to keep some three-dimensionality to them but when sewn properly, all the decorative elements seemed to blend together and lay almost flat with the top plate. From there, I also attached the fastenings up the left side of the centre back decoration so it could be closed.

With everything else done, the final steps to completing the tutu were securing the bodice to the tutu plate and adding elastic to the leg channels in the knickers that I didn’t have time to do beforehand.

With everything finished, here is the complete tutu!

Week 10

It’s the final week before the first hand in so I spent as much time as possible finishing these decorations. When sewing the petals, the central one is slightly different to the others. The one in the centre has an extra layer with a loop of piping that the bodice decoration sits inside, while the others have a single strip of piping sewn up the centre. I did notice that the layers distorted and wrinkled a little as they were sewn, ending up with excess fabric on one side that shouldn’t be there.

Moving back to the bodice decoration, I unpicked the piping and cut up the centre. I then re-sewed everything, lining up the layers at the centre instead of the outer edges. In doing this, I noticed that the layers at the bottom had shrunk across the width. It’s better than how it was before but I am really not happy with the shaping of it now.

Because they were so distorted, the petal decorations and bodice decoration needed a backing fabric to try and pull them back to their original shape. I have run out of the fabric that should be used, so I had to resort to using the old blue cotton to back the petals. This hasn’t quite given it the support it needs but when everything is sewn down to the tutu plate, it looks better. The only other thing that needed doing before sewing everything together was to hem the petals and bodice decoration.

With all individual elements complete, it was time to start putting the pieces together. I began with a test fitting, pinning the petals and orange decorations into place with the bodice on top to decide on the positioning of them. The hardest part of this was trying to make sure it looked as symmetrical as possible.

The remainder of this week was just spent hand sewing with a ladder stitch all elements to the top plate and each other. The only difference is between sewing the petals and orange decorations to the plate. On the illustration, there are two grey shapes underneath the lower bodice shaping and I haven’t been able to plan those pieces until now. With the petals permanently in place, I cut the oblong shapes to size and sewed black markings on them to replicate what is seen in the illustration. These were allowed to be a little oversized as the edges become covered by the decorative elements on top.

To get the tutu ready for the hand in, I quickly appliqued the bodice decoration to the bodice and secured the bodice to the tutu plate.

While this is the finished state for the hand in, I do think I will make changes to the tutu before it goes up on display. I am really not pleased with the shaping of the bodice decoration and all elements need to be sewn to the tutu plate with a tighter stitch than the loose stitches I have done for the sake of speed. There are a few smaller things that also need to be done such as the fastenings on the centre back orange decoration so that it can be secured closed without the use of pins.

Week 9

The navy decorations I had been putting off because I know they will take the most work, so I finally started them at the beginning of this week. I cut the patterns along the lines were bias binding is to be sewn and added seam allowances to them. The intention was to then cut the patterns from the fabric but there’s one issue, I underestimated how much fabric it would take to sew the decorations so I have to put this on hold until I have ordered some more.

While waiting for some more fabric to be delivered, I took on the task of stringing the layers of the tutu plate together. This is done by knotting loops that are staggered from the outer edges towards the middle, sewn only a few layers at a time. I do feel that I made these loops too tight. The idea is that the loops connect everything and keep the plate flat but instead, it seems to make the plate droop a little.

At the midpoint of the week, the new fabric arrived. As I had to get more anyway, I took it upon myself to order a fabric that was darker than the original one to better match the design. I cut all the patterns from the fabric and went about making the bias piping that I need to sew between the layers.

I tried sewing the bias binding on the bodice decoration to start with but I ran into some glaring problems. The pattern pieces were lined up perfectly at the outer edges but the middle has become too short, puckering away from the backing fabric. Another issue is that sewing the bodice decoration used more than half the bias tape I had so I have to wait again for some more to arrive before I can complete the petal decorations. With working on this for so long and having so many issues pop up in one day, I stopped at this point. I’ll return to working on it when I have enough bias tape and I will try to fix the bodice decoration then.